

Documenting your dbt project
Written by Kristian Svedal
Do you dread documentation or feel it is a thankless task that may be added to the backlog, only to be worked on some day in the future? As a Data Engineer or Data Analyst you may have lots of incoming ad-hoc requests and documentation is not considered a top priority.
I would urge you to think otherwise. In this article we first introduce documentation in general before diving into how you may organize your documentation with dbt (data build tool).
Making documentation a part of your workflow
How documentation is done varies wildly from workplace to workplace, even between teams and projects. There may be several reasons for this: lack of routines, no defined baseline for what should be documented and how documentation should be done, culture, short deadlines, shifting priorities and so forth.
Imagine a manager onboarding a new Data Engineer, the Data Engineer asks for documentation to better understand the history of the project, the current infrastructure, architecture, and data models. The documentation is outdated and scattered, with some old notes on Confluence, some Word documents here and there, while the rest of the knowledge lies in the heads of people who already left the organization.
What should we do then? Thomas and Hunt (2020, 23) argue that documentation should be a natural part of the development process. Documentation and code should live together, it should be alive and maintained, as opposed to being scattered, outdated and of little to no value. In their view – the code is the documentation (including sparse use of comments). A great benefit of this is that it is version controlled (e.g., using Git).
However, many users of documentation are not programmers or data folks, they may be less-technical analysts or business users. Ask yourself, who is the audience of our documentation – who do we write it for and why? If working in dbt, adding documentation to the project may benefit not only technical users but also business users. Let us try to find a middle ground where code and descriptions are added as part of the workflow in dbt development.
Organizing your dbt documentation
A wonderful thing about dbt is that everything is code – models, configuration, and documentation. Write your transformation logic with models (i.e. SQL-files or Python-files) and configure them with YAML. Agree on the baseline of documentation in your dbt-projects, for instance whether to document all models or certain models such as those that are to be exposed to consumers (public models). Coming back to the development workflow – make sure before the code review that your model is documented. Make it a part of the requirement for when it is considered done. You can use a merge / pull request template, to make sure your team members check off whether documentation has been added in the commit (https://github.com/dbt-labs/dbt-init/blob/master/starter-project/.github/pull_request_template.md).
But you may take this one step further using pre-commit hooks, to ensure that for your commits to pass, your models and columns must have descriptions (https://github.com/dbt-checkpoint/dbt-checkpoint?tab=readme-ov-file).
A place to start with documentation in dbt, is to add model and column descriptions by using the description key in your YAML files (source and model configurations). This is simple to start with but what if you reuse columns in downstream models? Then you must copy the same descriptions for the downstream configurations. This is not DRY. There must be a better way to do this. Markdown and “doc blocks” come to the rescue!
Throw Markdown in the mix and start referencing
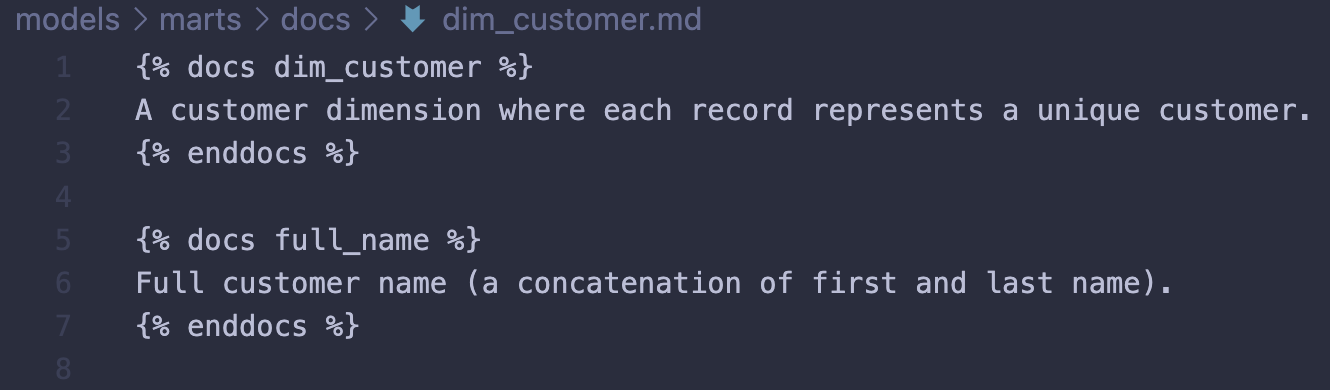
A great alternative is to document your models and columns with Markdown. Add documentation where the models and columns first appear in your project with doc blocks, then reference your documentation in the YAML-files using the doc function (https://docs.getdbt.com/docs/collaborate/documentation). Write descriptions once and reuse. A constraint to be aware of is that doc blocks must be uniquely named within the scope of your project.
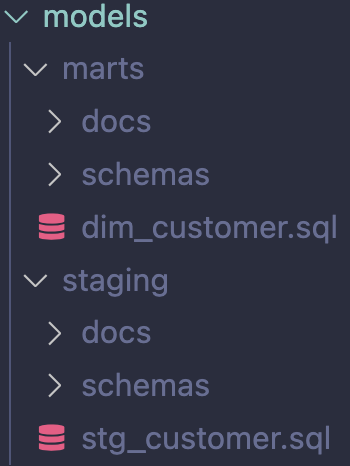
For instance, depending on the size of your project, one option is to add subdirectories such as docs/ and schemas/ in your various directories under models/ (e.g. “layers”). It is up to you to decide on whether to have one potentially large Markdown per layer (subdirectory under models/ such as staging/) or split up in one markdown per model. Do take note this may lead to many files in your project due, with three files required per model (a model file, a configuration file and a documentation file).
Imagine you just started building your first dbt project. Your task is to first create a model stg_customers and then dim_customers which references the staging-model. One way to organize this is to have a similar structure:
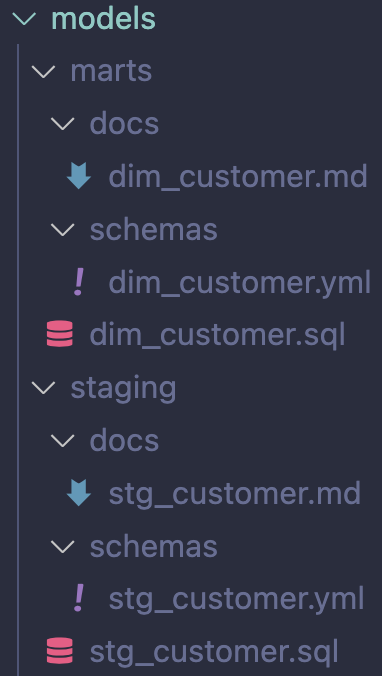
Splitting up in separate files per model leads to more files but makes it easier to locate where to make changes:
You create a simple customer dimension:
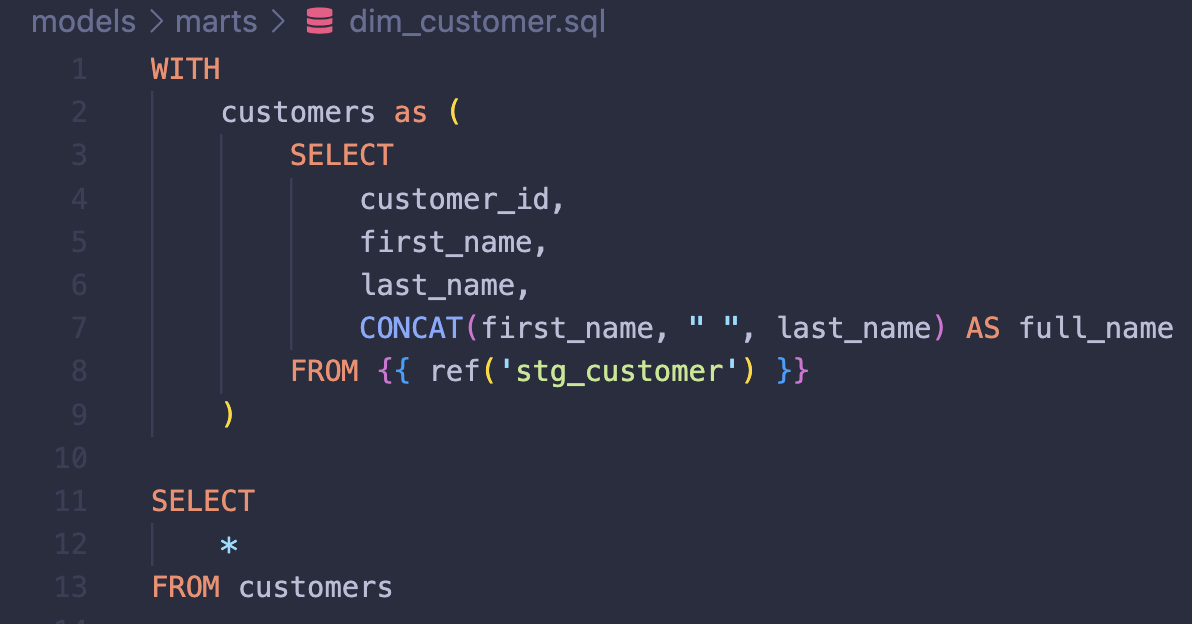
In this case, the only new column appearing in dim_customer is the column full_name. All the other columns are referenced from stg_customer. Here, all referenced columns would have descriptions in a Markdown file in the staging directory (source for dim_customer):
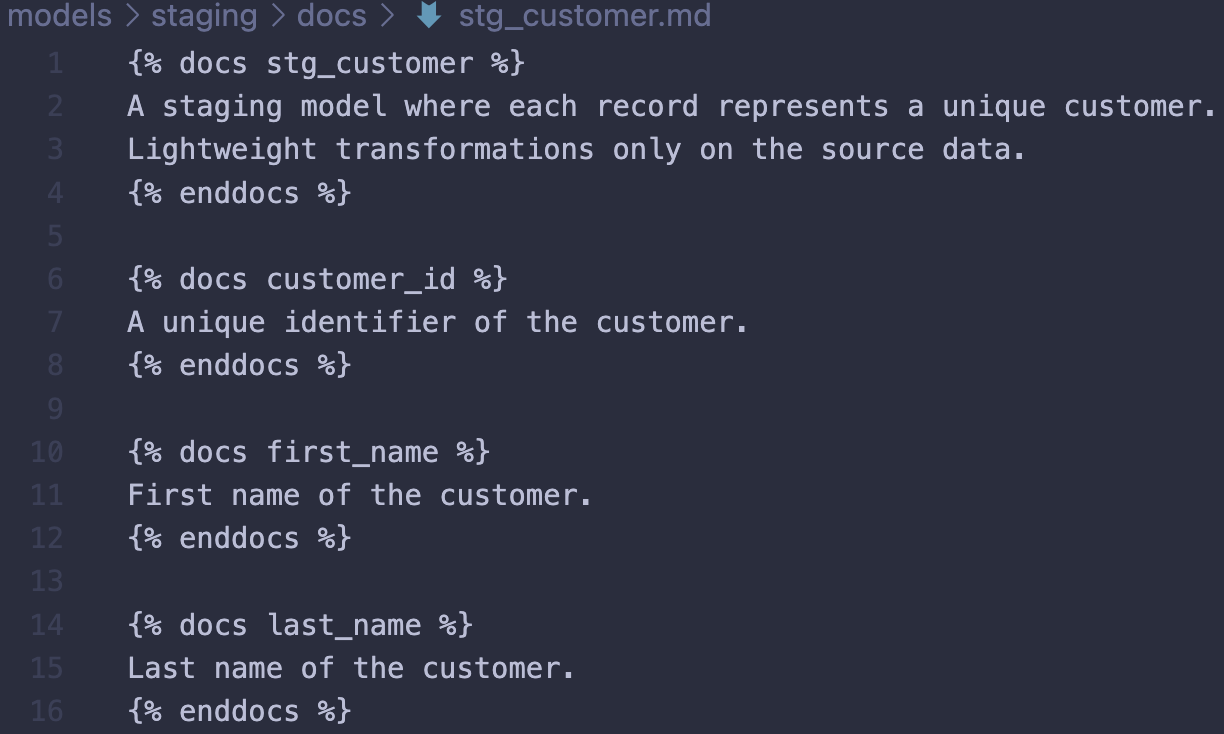
Model and column descriptions are added using doc blocks. Markdown adds flexibility with more options to what you may add to your documentation. For the purpose of simplicity, let’s say these columns first appeared in the project in the staging-layer, then we would add the descriptions in this layer and use references (doc function) in downstream YAML configurations for models selecting those columns. The rest of the descriptions which are new to the project introduced in dim_customers would be stored in the marts directory:
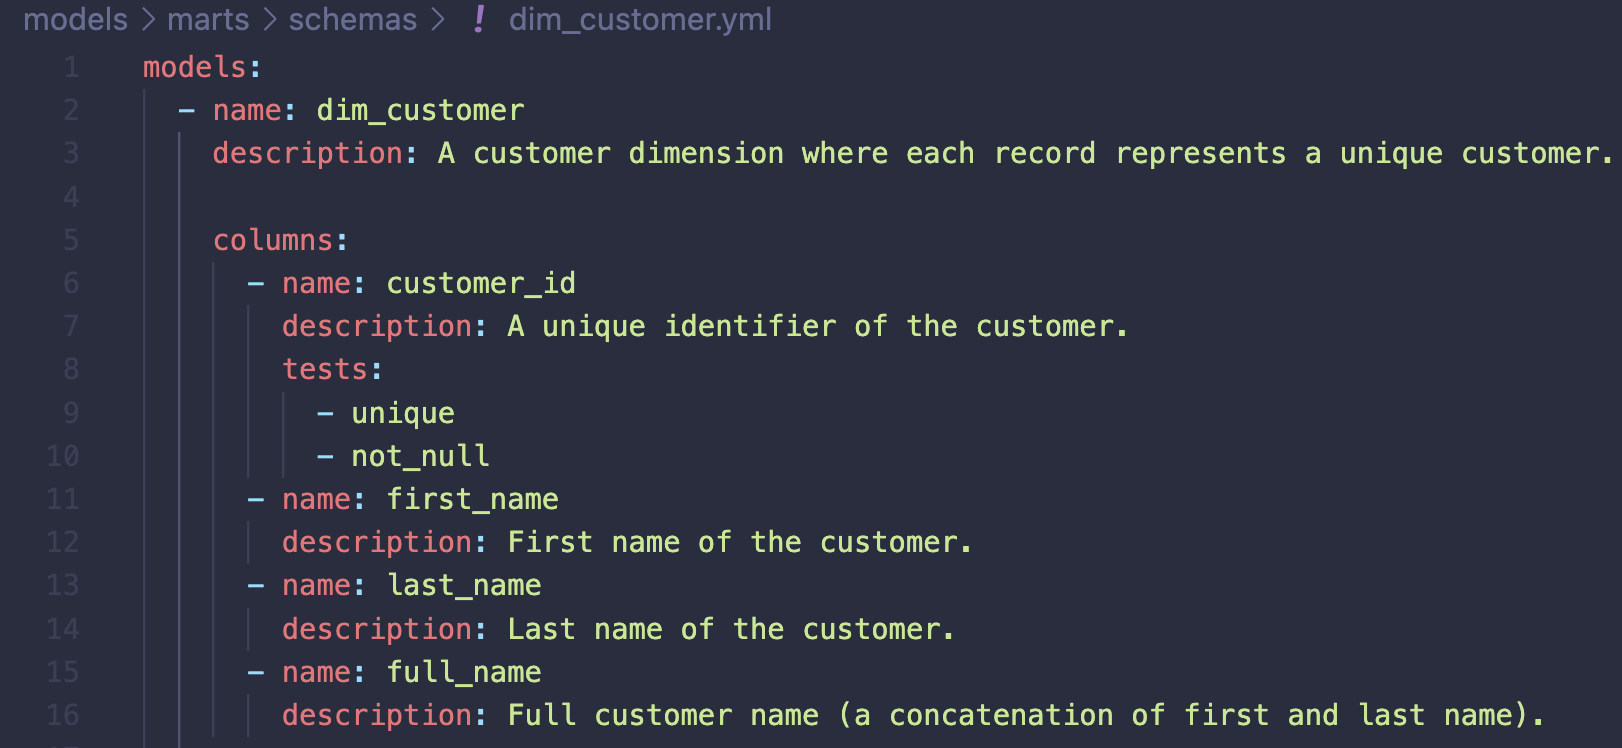
A typical (simple) model configuration would look something like this before making your documentation DRY with doc blocks:
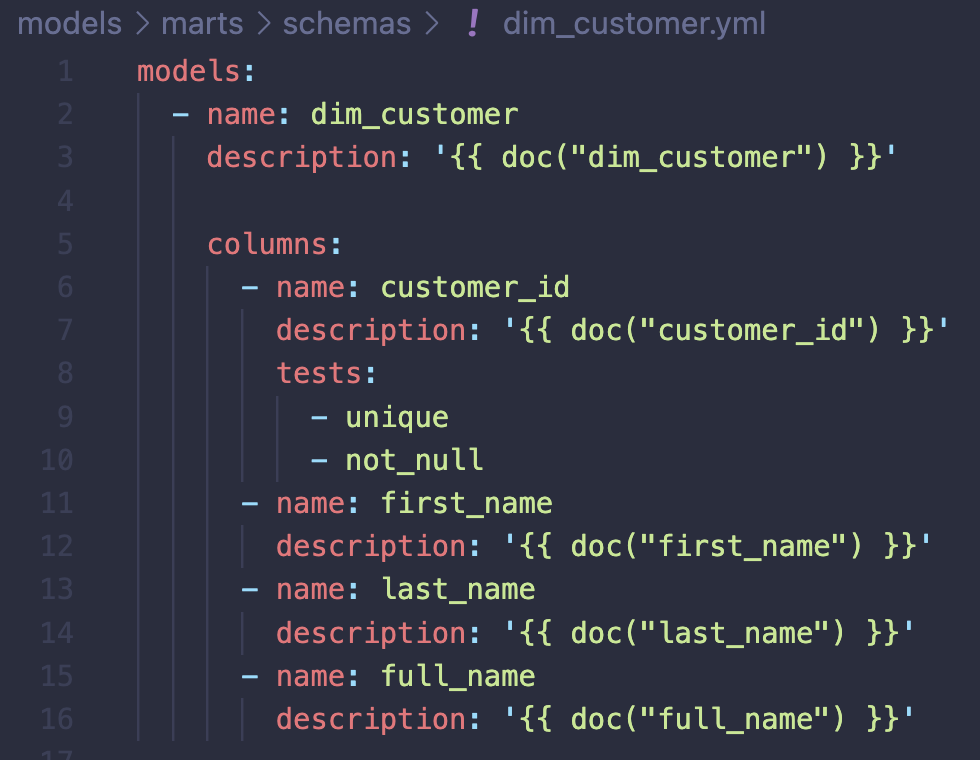
It is not unusual to start documenting a dbt project like this. If you have a very small project with little reuse of documentation, this is all fine. However, with more nodes added to your project DAG (e.g. sources, models), it will become harder to maintain the project documentation. Now, in your journey to make the documentation reusable (write it once and reference downstream), you introduce Markdown files to the project which keeps the descriptions. The next step is to replace the values mapped to the description keys with references using a doc function:
A recommendation is to start with adding docs in your source definitions, then reference downstream.
Only new model and column descriptions should be added to Markdown / docs in the layer / directory where those are first introduced.
A final tip is to add the persist_docs key in your project configuration file (dbt_project.yml). If your target database is Snowflake, the model and column descriptions will persist as comments and can be viewed in Snowflake using SHOW TABLE, SHOW COMMENT or selecting from the information schema view COLUMNS.

Figure: Example created using Excalidraw (https://github.com/excalidraw/excalidraw)
To summarize, think about who you write your documentation for and why, agree on what to document, make documentation a habit and part of your development workflow, include automated checks (like pre-commit hooks) and as part of your CICD pipeline, make your documentation DRY and think about ways it may be utilized and rendered to various users. For instance, all that documentation may one day become a treasure trove if the organization decides to implement an enterprise data catalog. Making an update to an existing model? Make sure to also in the same commit update your Markdown file(s). Yourself, your current and future peers and consumers will thank you for going the extra mile.
References
Thomas and Hunt. The Pragmatic Programmer: your journey to mastery, 20th Anniversary Edition, 2nd Edition. 2020. Addison-Wesley Professional, 2020.
dbt About documentation. https://docs.getdbt.com/docs/collaborate/documentation
Pull Request template. https://github.com/dbt-labs/dbt-init/blob/master/starter-project/.github/pull_request_template.md
dbt-checkpoint. https://github.com/dbt-checkpoint/dbt-checkpoint?tab=readme-ov-file